

If you’re someone who loves playing games or owns a website, you’ve probably encountered the dreaded ‘G Portal Server Not Responding Error.’ It’s that frustrating moment when things go wrong, and it can mess up your gaming sessions or make your website disappear from the internet. But don’t worry, I’ve been there too, and I know just how irritating it can be.
In this article, we’re going to tackle this problem together. I’ll share a bunch of helpful troubleshooting methods, tips, and some insider tricks that I’ve used in the past to bring life back to my server. So, let’s dive into this challenge and conquer the ‘G Portal Server Not Responding Error’ once and for all!
Contents
- 1 Some Common Causes of G Portal Server Not Responding Error
- 1.1 Steps to Fix G Portal Server Not Responding Error
- 1.1.1 1. Check Your Internet Connection:
- 1.1.2 2. Verify G Portal Ark Server Status:
- 1.1.3 3. Clear Browser Cache and Cookies:
- 1.1.3.1 Step 1: Open Your Web Browser
- 1.1.3.2 Step 2: Access Browser Settings
- 1.1.3.3 Step 3: Go to Settings or Options
- 1.1.3.4 Step 4: Navigate to Privacy and Security
- 1.1.3.5 Step 5: Clear Browsing Data
- 1.1.3.6 Step 6: Choose What to Clear
- 1.1.3.7 Step 7: Select Time Range (Optional)
- 1.1.3.8 Step 8: Clear Data
- 1.1.3.9 Step 9: Wait for Completion
- 1.1.3.10 Step 10: Restart Your Browser
- 1.1.3.11 Step 11: Revisit G Portal Server
- 1.1.4 4. Disable Antivirus and Firewall Temporarily:
- 1.1.4.1 Step 1: Locate Antivirus and Firewall Software
- 1.1.4.2 Step 2: Open Antivirus and Firewall Settings
- 1.1.4.3 Step 3: Disable Real-time Protection
- 1.1.4.4 Step 4: Temporarily Turn Off Real-time Protection
- 1.1.4.5 Step 5: Confirm the Action
- 1.1.4.6 Step 6: Attempt to Access G Portal Ark Server
- 1.1.4.7 Step 7: Re-enable Real-time Protection
- 1.1.4.8 Step 8: Additional Firewall Settings (if necessary)
- 1.1.4.9 Step 9: Restart Your Computer (Optional)
- 1.1.5 5. Restart G Portal Game Server:
- 1.1.5.1 Step 1: Log In to Your G Portal Account
- 1.1.5.2 Step 2: Access Your Game Server Dashboard
- 1.1.5.3 Step 3: Select Your Game Server
- 1.1.5.4 Step 4: Initiate the Server Restart
- 1.1.5.5 Step 5: Confirm the Restart
- 1.1.5.6 Step 6: Wait for the Server to Restart
- 1.1.5.7 Step 7: Verify Server Status
- 1.1.5.8 Step 8: Test Your Connection
- 1.1.5.9 Step 9: Monitor Server Stability
- 1.1.6 6. Update Game and Server Software:
- 1.1.7 Updating Your G Portal Server:
- 1.1.7.1 Step 1: Log In to Your G Portal Account
- 1.1.7.2 Step 2: Access Your Game Server Dashboard
- 1.1.7.3 Step 3: Select Your Game Server
- 1.1.7.4 Step 4: Check for Server Updates
- 1.1.7.5 Step 5: Initiate the Server Update
- 1.1.7.6 Step 6: Wait for the Update to Complete
- 1.1.7.7 Step 7: Verify the Server Status
- 1.1.7.8 Step 8: Test the Server
- 1.1.7.9 Step 9: Monitor Server Performance
- 1.1.8 7. Contact G Portal Support:
- 1.1.8.1 Step 1: Gather Information
- 1.1.8.2 Step 2: Visit the G Portal Website
- 1.1.8.3 Step 3: Access the Support Section
- 1.1.8.4 Step 4: Choose Contact Method
- 1.1.8.5 Step 5: Fill Out the Contact Form or Start a Chat
- 1.1.8.6 Step 6: Attach Screenshots or Logs (if applicable)
- 1.1.8.7 Step 7: Submit the Request
- 1.1.8.8 Step 8: Wait for a Response
- 1.1.8.9 Step 9: Follow Support Instructions
- 1.1.8.10 Step 10: Keep Communication Open
- 1.1.8.11 Step 11: Confirm Resolution
- 1.1.9 8. Check Mods and Plugins:
- 1.1.9.1 Step 1: Log In to Your G Portal Account
- 1.1.9.2 Step 2: Access Your Game Server Dashboard
- 1.1.9.3 Step 3: Identify Installed Mods or Plugins
- 1.1.9.4 Step 4: Disable Mods or Plugins
- 1.1.9.5 Step 5: Restart the Server
- 1.1.9.6 Step 6: Test the Server
- 1.1.9.7 Step 7: Monitor Server Performance
- 1.1.9.8 Step 8: Identify Problematic Mods or Plugins
- 1.1.9.9 Step 9: Update or Find Alternatives
- 1.1.9.10 Step 10: Maintain a Stable Mod or Plugin Set
- 1.1.10 9. Optimize Server Settings:
- 1.1.10.1 Step 1: Log In to Your G Portal Account
- 1.1.10.2 Step 2: Access Your Game Server Dashboard
- 1.1.10.3 Step 3: Access Server Configuration
- 1.1.10.4 Step 4: Review Player Slots
- 1.1.10.5 Step 5: Examine World Size and Settings
- 1.1.10.6 Step 6: Adjust Resource Allocation
- 1.1.10.7 Step 7: Save Configuration Changes
- 1.1.10.8 Step 8: Restart the Server
- 1.1.10.9 Step 9: Test the Server
- 1.1.10.10 Step 10: Monitor Server Performance
- 1.1.10.11 Step 11: Consider Professional Support (Optional)
- 1.1.11 10. Test from Another Device:
- 1.1.11.1 Step 1: Identify Another Device
- 1.1.11.2 Step 2: Ensure Network Connectivity
- 1.1.11.3 Step 3: Install Necessary Software (if applicable)
- 1.1.11.4 Step 4: Access the G Portal Server
- 1.1.11.5 Step 5: Test Connectivity
- 1.1.11.6 Step 6: Observe the Results
- 1.1.11.7 Step 7: Compare Device-Specific Settings
- 1.1.11.8 Step 8: Check Network Connectivity on the Original Device
- 1.1.12 11. Use a Wired Connection (For Game Servers):
- 1.1.12.1 Step 1: Prepare the Equipment
- 1.1.12.2 Step 2: Shut Down the Server (if necessary)
- 1.1.12.3 Step 3: Locate an Ethernet Port
- 1.1.12.4 Step 4: Connect the Ethernet Cable
- 1.1.12.5 Step 5: Locate Your Router/Modem
- 1.1.12.6 Step 6: Locate an Available Ethernet Port on the Router/Modem
- 1.1.12.7 Step 7: Connect the Other End of the Ethernet Cable
- 1.1.12.8 Step 8: Secure the Cable
- 1.1.12.9 Step 9: Power On Your Server
- 1.1.12.10 Step 10: Configure Network Settings (if needed)
- 1.1.12.11 Step 11: Test Your Server
- 1.1.12.12 Step 12: Monitor Performance
- 1.1.13 12. Investigate Modem and Router Settings:
- 1.1.13.1 Step 1: Gather Necessary Information
- 1.1.13.2 Step 2: Access Router Settings
- 1.1.13.3 Step 3: Log In to Your Router
- 1.1.13.4 Step 4: Locate Port Forwarding Settings
- 1.1.13.5 Step 5: Add Port Forwarding Rules
- 1.1.13.6 Step 6: Save the Settings
- 1.1.13.7 Step 7: Test Your G Portal Server
- 1.1.13.8 Step 8: Monitor Server Performance
- 1.1.13.9 Step 9: Contact Router Manufacturer (if needed)
- 1.1.14 13. Monitor Server Resources:
- 1.1.14.1 Step 1: Log In to Your G Portal Account
- 1.1.14.2 Step 2: Access Your Game Server Dashboard
- 1.1.14.3 Step 3: Monitor Resource Usage
- 1.1.14.4 Step 4: Identify Resource Bottlenecks
- 1.1.14.5 Step 5: Optimize Resource Usage
- 1.1.14.6 Step 6: Restart the Server
- 1.1.14.7 Step 7: Test the Server
- 1.1.14.8 Step 8: Monitor Performance
- 1.1.14.9 Step 9: Consider Upgrading Your Plan (if needed)
- 1.1.14.10 Step 10: Contact G Portal Support (if needed)
- 1.1.15 14. Test During Off-Peak Hours:
- 1.1.15.1 Step 1: Identify Off-Peak and Peak Hours
- 1.1.15.2 Step 2: Monitor Server Performance During Off-Peak Hours
- 1.1.15.3 Step 3: Run Load Tests During Off-Peak Hours
- 1.1.15.4 Step 4: Analyze Off-Peak Performance
- 1.1.15.5 Step 5: Identify Performance Issues During Peak Hours
- 1.1.15.6 Step 6: Take Immediate Action During Peak Issues
- 1.1.15.7 Step 7: Long-Term Solutions
- 1.1.16 15. Run a Ping Test:
- 1.1.17 16. Restart Your Computer or Device:
- 1.1.17.1 Step 1: Save Your Work
- 1.1.17.2 Step 2: Close All Applications
- 1.1.17.3 Step 3: Windows OS Restart (PC)
- 1.1.17.4 Step 4: macOS Restart (Mac)
- 1.1.17.5 Step 5: iOS Device Restart (iPhone or iPad)
- 1.1.17.6 Step 6: Android Device Restart
- 1.1.17.7 Step 7: Wait for the Device to Restart
- 1.1.17.8 Step 8: Test Your Network and Services
- 1.1.17.9 Step 9: Monitor for Stability
- 1.1.18 17. Check for Server Region and Location:
- 1.1.18.1 Step 1: Log into Your G Portal Account
- 1.1.18.2 Step 2: Access Your Server Dashboard
- 1.1.18.3 Step 3: Check the Current Server Location
- 1.1.18.4 Step 4: Analyze Your Target Audience
- 1.1.18.5 Step 5: Evaluate Server Locations
- 1.1.18.6 Step 6: Select a New Server Location
- 1.1.18.7 Step 7: Confirm the Location Change
- 1.1.18.8 Step 8: Save and Apply Changes
- 1.1.18.9 Step 9: Monitor Server Performance
- 1.1.18.10 Step 11: Performance Optimization
- 1.1.18.11 Step 12: Consider Redundancy
- 1.1.19 18. Disable VPN and Proxy:
- 1.1.20 19. Verify Server Mod Compatibility:
- 1.1.20.1 Step 1: List Installed Mods
- 1.1.20.2 Step 2: Check Official Mod Documentation
- 1.1.20.3 Step 3: Verify Game Version Compatibility
- 1.1.20.4 Step 4: Review Mod Descriptions and Release Notes
- 1.1.20.5 Step 5: Visit Modding Communities
- 1.1.20.6 Step 7: Test Mods Together
- 1.1.20.7 Step 8: Monitor Server Performance
- 1.1.20.8 Step 9: Troubleshoot and Resolve Issues
- 1.1.20.9 Step 10: Document Compatibility Information
- 1.1.20.10 Step 11: Educate Players
- 1.1.20.11 Step 12: Periodically Reevaluate Compatibility
- 1.1.20.12 Step 13: Communicate with Mod Authors
- 1.1.21 20. Perform a Traceroute:
- 1.1.21.1 Step 1: Open the Command Prompt (Windows) or Terminal (macOS/Linux)
- 1.1.21.2 Step 2: Run the Traceroute Command
- 1.1.21.3 Step 3: Review the Traceroute Results
- 1.1.21.4 Step 4: Identify Network Bottlenecks
- 1.1.21.5 Step 5: Interpret the Results
- 1.1.21.6 Step 6: Take Action
- 1.1.21.7 Step 7: Save the Results (optional)
- 1.1.22 21. Test Other Online Services:
- 1.1.22.1 Step 1: Identify the Issue
- 1.1.22.2 Step 2: Test Multiple Online Services
- 1.1.22.3 Step 3: Test Online Games or Applications
- 1.1.22.4 Step 4: Check for Consistency
- 1.1.22.5 Step 5: Contact Your ISP
- 1.1.22.6 Step 6: Provide Details to Your ISP
- 1.1.22.7 Step 7: Follow ISP Guidance
- 1.1.22.8 Step 8: Monitor for Resolution
- 1.1.23 22. Test on Different Browsers:
- 1.1.23.1 Step 1: Prepare a List of Web Browsers
- 1.1.23.2 Step 2: Access the G Portal Server
- 1.1.23.3 Step 3: Perform Basic Functionality Tests
- 1.1.23.4 Step 4: Clear Browser Cache and Cookies
- 1.1.23.5 Step 5: Repeat Steps 2-4 for Each Browser
- 1.1.23.6 Step 6: Document the Results
- 1.1.23.7 Step 7: Compare Results
- 1.1.23.8 Step 9: Check for Browser Updates
- 1.1.23.9 Step 10: Consult Browser Compatibility Resources
- 1.1.23.10 Step 11: Implement Fixes or Workarounds
- 1.1.23.11 Step 12: Retest
- 1.1.23.12 Step 13: Communicate with Users
- 1.1.24 23. Optimize In-Game Settings:
- 1.1.24.1 Step 1: Launch the Game
- 1.1.24.2 Step 2: Access the In-Game Settings Menu
- 1.1.24.3 Step 3: Graphics Settings
- 1.1.24.4 Step 4: Make Gradual Adjustments
- 1.1.24.5 Step 5: Monitor Frame Rate
- 1.1.24.6 Step 6: Balance Performance and Visual Quality
- 1.1.24.7 Step 7: Apply Settings and Restart Game
- 1.1.24.8 Step 8: Test Server Responsiveness
- 1.1.24.9 Step 9: Fine-Tune as Needed
- 1.1.25 24. Investigate Server Hardware:
- 1.1.25.1 Step 1: Schedule Regular Hardware Inspections
- 1.1.25.2 Step 2: Plan Downtime
- 1.1.25.3 Step 3: Back Up Data
- 1.1.25.4 Step 4: Turn Off and Unplug the Server
- 1.1.25.5 Step 5: Open the Server Chassis
- 1.1.25.6 Step 6: Visual Inspection
- 1.1.25.7 Step 7: Check Error Logs
- 1.1.25.8 Step 8: Replace Faulty Components
- 1.1.25.9 Step 9: Update Firmware and Drivers
- 1.1.25.10 Step 10: Close and Secure the Chassis
- 1.1.25.11 Step 11: Power On and Test
- 1.1.25.12 Step 12: Restore Data and Services
- 1.1.25.13 Step 13: Document the Inspection
- 1.1.26 25. Seek Professional Help:
- 1.1.26.1 Step 1: Prepare Relevant Information
- 1.1.26.2 Step 2: Research and Identify Professionals
- 1.1.26.3 Step 3: Contact Professionals
- 1.1.26.4 Step 4: Provide Information and Documentation
- 1.1.26.5 Step 5: Schedule a Consultation or Diagnostic Session
- 1.1.26.6 Step 6: Discuss the Issue
- 1.1.26.7 Step 7: Allow the Professional to Investigate
- 1.1.26.8 Step 8: Receive Recommendations or Solutions
- 1.1.26.9 Step 9: Implement Recommendations
- 1.1.26.10 Step 10: Test and Monitor
- 1.1.26.11 Step 11: Communicate with the Professional
- 1.1.26.12 Step 12: Payment and Follow-Up
- 1.2 Frequently Asked Questions(FAQ’s)
- 1.2.1 How common is the “G Portal Server Not Responding Error”?
- 1.2.2 Can a slow internet connection cause this error?
- 1.2.3 What does it mean when a G Portal server is not responding?
- 1.2.4 Is server unresponsiveness common with G Portal servers?
- 1.2.5 How can I check if the server is down for everyone or just me?
- 1.2.6 Can mods or plugins cause server unresponsiveness?
- 1.2.7 Should I restart my server immediately when it’s not responding?
- 1.2.8 How can I prevent server unresponsiveness in the future?
- 1.2.9 What should I do if my server is unresponsive during peak usage times?
- 1.2.10 Is it possible for my internet connection to cause server unresponsiveness?
- 1.2.11 Why do server logs matter when troubleshooting unresponsiveness?
- 1.2.12 Is server unresponsiveness always fixable?
- 1.3 Conclusion
- 1.1 Steps to Fix G Portal Server Not Responding Error
Some Common Causes of G Portal Server Not Responding Error
The “G Portal Server Not Responding Error” can occur due to several reasons. Understanding these causes can help you tackle the issue effectively. Here are some common factors that may lead to this error:
- Internet Connection Issues: A stable internet connection is essential for your device to communicate with the G Portal server. If your internet connection is poor or unstable, it can result in the server error. Ensure that you have a reliable and fast internet connection.
- Server Outages or Maintenance: Sometimes, the G Portal server itself might experience outages or go through scheduled maintenance. During these periods, the server will be temporarily unresponsive. Check the G Portal website or support channels for any announcements about server status.
- Corrupted Browser Cache and Cookies: If you’re accessing G Portal through a web browser, corrupted cache and cookies can hinder the connection. Clear your browser’s cache and cookies to resolve this issue.
- Antivirus and Firewall Interference: Overprotective antivirus or firewall settings can block the necessary connections to the G Portal server. Adjust your antivirus or firewall settings to allow the required connections.
- Outdated Game or Server Software: Using outdated versions of game or server software can cause compatibility issues, leading to server errors. Ensure that both your game and server software are up to date.
- Mods or Plugins Conflict: If you have installed mods or plugins on your game server, they might conflict with each other or with the game’s latest version. Review and update your mods or plugins to ensure compatibility.
- Overloaded Server Resources: An overcrowded or resource-intensive server may become unresponsive. Monitor server resource usage and consider upgrading your server’s capacity if needed.
- Network Bottlenecks: High latency or network hops with delays can affect communication between your device and the G Portal server. Ensure that your internet connection has low latency and minimal packet loss.
- Incompatible Mods or Plugins: Some mods or plugins may not be compatible with each other or the game, causing the server to become unresponsive. Review your installed mods/plugins and their compatibility with the game version.
- Server Location and Region: Using a server location far from your target audience can result in higher response times. Choose a server location that is geographically closer to your players to reduce latency.
- Issues with Router or Modem Settings: Incorrect settings on your modem or router, such as port forwarding or NAT configurations, can cause connection problems. Ensure your router settings are correctly configured for gaming.
- Device-Specific Issues: Sometimes, the problem may be isolated to a specific device, such as a computer or mobile device. Check the device’s network settings and ensure there are no conflicts.
- VPN or Proxy Interference: VPN or proxy services can sometimes interfere with server connections. Disable VPN or proxy services while connecting to the G Portal server.
- Resource-Intensive Graphics Settings: High graphics settings in your game can strain your computer’s resources, potentially affecting server responsiveness. Lower your graphics settings if necessary.
- Dedicated Server Hardware Problems: For dedicated server owners, hardware malfunctions or failures can lead to the error. Monitor server hardware health and address any hardware issues promptly.
Steps to Fix G Portal Server Not Responding Error
1. Check Your Internet Connection:
Step 1: Physical Inspection
- Check Network Cables: Start by examining all the network cables connected to your modem and router. Ensure that they are securely plugged in at both ends and free from visible damage. If you notice any frayed or loose cables, replace them.
- Inspect Modem and Router: Examine your modem and router for any unusual lights or indicators. Normally, there should be steady lights corresponding to power, internet connection, and other relevant functions. If you see any flashing or unusual patterns, consult the device’s manual or contact the manufacturer for guidance.
You Might Also Like, Steps to Register and Login at Fantasy Sports Games
Step 2: Restart Your Router
- Power Cycle the Router: To resolve potential issues with your router, perform a simple power cycle:
- Unplug the power cable from the back of your router.
- Wait for about 10-15 seconds.
- Plug the power cable back in.
- Allow the router to fully reboot, which may take a few minutes.
Step 3: Check Internet Connectivity
- Test Internet on Other Devices: Verify whether the internet is working on other devices such as smartphones, tablets, or other computers. If these devices can access the internet without any issues, it suggests that your internet connection is functional.
- Ping Test: If you suspect issues with internet stability, you can perform a ping test to a reliable website or server to check for packet loss or high latency. Here’s how to do it on a Windows computer:
- Press
Win + Rto open the Run dialog. - Type “cmd” and press Enter to open the Command Prompt.
- In the Command Prompt, type:
ping google.comand press Enter. - Observe the results for any packet loss or unusually high response times.
- Press
You can also read, How to Choose the Best Online Gaming Casino Platform
Step 4: Contact Your ISP
- ISP Contact: If you’ve confirmed that your internet connection is unstable or not working correctly, it’s time to contact your Internet Service Provider (ISP). You can find their customer support number on your monthly bill or their website.
- Describe the Issue: When speaking with your ISP’s customer support, describe the issue in detail. Mention that you are experiencing connection problems, which are affecting your online gaming or access to specific servers like G-Portal or Chess.com. They may be able to diagnose and resolve the issue remotely or send a technician if needed.
2. Verify G Portal Ark Server Status:
Step 1: Open Your Web Browser
- Launch your preferred web browser on your computer or mobile device.
Step 2: Visit the Official G Portal Website
- In the address bar of your web browser, type the official G Portal website URL, which is typically “www.g-portal.com,” and press Enter.
Step 3: Check for Server Status Information
- Once you’re on the G Portal website’s main page, look for any information related to server status or announcements. This information is often displayed prominently on the website’s homepage or in a dedicated section.
Step 4: Check Social Media Channels
- If you couldn’t find server status information on the website, consider checking G Portal’s official social media channels. They often provide updates and announcements regarding server outages or maintenance on platforms like Twitter, Facebook, or Instagram.
Step 5: Look for Announcements
- Pay close attention to any announcements or posts that mention server status. G Portal typically communicates server-related issues and maintenance schedules through these channels.
Step 6: Verify Server Status
- If there is an announcement about server issues or maintenance, take note of the information provided. It may include details about the expected duration of the outage or any specific actions you should take.
Step 7: Wait for Server Resolution
- If you discover that there is a widespread issue with the G Portal Ark Server, the best course of action may be to wait for G Portal’s team to resolve the problem. Server outages and maintenance are typically handled by their technical team, and the issue should resolve on its own once the server is back online.
3. Clear Browser Cache and Cookies:
Step 1: Open Your Web Browser
- Launch your preferred web browser on your computer. This guide is generic and can be applied to most major web browsers like Google Chrome, Mozilla Firefox, Microsoft Edge, or Safari.
Step 2: Access Browser Settings
- In your browser, locate and click on the menu button. This button is usually represented by three vertical dots (Chrome), three horizontal lines (Firefox), or a gear icon (Edge).
Step 3: Go to Settings or Options
- In the menu that appears, find and click on “Settings” (Chrome), “Options” (Firefox), or “Settings” (Edge). For Safari users on macOS, you can find these options under the “Safari” menu.
- Look for a section related to “Privacy and Security” or a similar option in the settings menu. Click on it to access the relevant privacy settings.
Step 5: Clear Browsing Data
- Within the Privacy and Security section, you’ll typically find an option to “Clear Browsing Data,” “Clear History,” or similar. Click on this option to proceed.
Step 6: Choose What to Clear
- A new window or tab will open, allowing you to choose what data to clear. You’ll usually see options like:
- Browsing history
- Cookies and other site data
- Cached images and files
- Check the boxes next to “Cookies and other site data” and “Cached images and files.” You can leave other options unchecked if you only want to clear these specific items.
Step 7: Select Time Range (Optional)
- Some browsers give you the option to clear data from a specific time range (e.g., the last hour, 24 hours, 7 days). You can choose the time range that suits your needs, or select “All time” to clear all cookies and cached data.
Step 8: Clear Data
- After selecting the options, click the “Clear Data” or “Clear Browsing Data” button. Your browser will start the process of clearing the cache and cookies.
Step 9: Wait for Completion
- Depending on the amount of data to be cleared, this process may take a few seconds to a minute or more. Be patient and wait for it to finish.
Step 10: Restart Your Browser
- Once the data is cleared, you’ll receive a confirmation message. Close and reopen your web browser to ensure that the changes take effect.
Step 11: Revisit G Portal Server
- After restarting your browser, visit the G Portal server website or the relevant web application where you were experiencing the error. Your browser will now load the site as if you were visiting it for the first time, without any cached data.
4. Disable Antivirus and Firewall Temporarily:
Step 1: Locate Antivirus and Firewall Software
- Look for the antivirus and firewall software on your computer. Common antivirus programs include Norton, McAfee, Windows Defender, AVG, Avast, and others. Firewall settings may also be part of your antivirus software or controlled by your operating system.
Step 2: Open Antivirus and Firewall Settings
- Launch the antivirus or firewall software from your system tray (usually located in the lower-right corner of your screen) or by searching for the program in your computer’s applications.
Step 3: Disable Real-time Protection
- Within the antivirus or firewall settings, locate the option for “Real-time Protection” or “Firewall Protection.” This option is responsible for continuous monitoring and blocking of potential threats.
Step 4: Temporarily Turn Off Real-time Protection
- Select the option to disable or turn off real-time protection. The exact wording may vary depending on your antivirus software, but it’s typically a straightforward toggle switch or button.
Step 5: Confirm the Action
- Your antivirus or firewall may ask you to confirm that you want to disable real-time protection. Confirm the action to proceed.
Step 6: Attempt to Access G Portal Ark Server
- With real-time protection temporarily disabled, try accessing the G Portal Ark Server or the online service you were experiencing issues with. This step allows you to check if the antivirus or firewall was indeed causing the problem.
Step 7: Re-enable Real-time Protection
- After testing, it’s crucial to re-enable real-time protection promptly to ensure your computer’s security. Return to the antivirus or firewall settings and toggle the real-time protection back on.
Step 8: Additional Firewall Settings (if necessary)
- If you’re using a separate firewall application or Windows Firewall, you may need to adjust additional settings. These settings could include allowing specific programs or ports for server access. Refer to your firewall’s documentation or settings menu for guidance.
Step 9: Restart Your Computer (Optional)
- Sometimes, changes to antivirus or firewall settings may require a computer restart to take full effect. If you continue to experience issues after re-enabling real-time protection, consider restarting your computer.
Note: If disabling your antivirus and firewall resolves the issue, it’s possible that one of these security measures was blocking your connection to the G Portal Ark Server or the online service. In such cases, you may need to configure your antivirus or firewall to allow the necessary connections rather than keeping them permanently disabled.
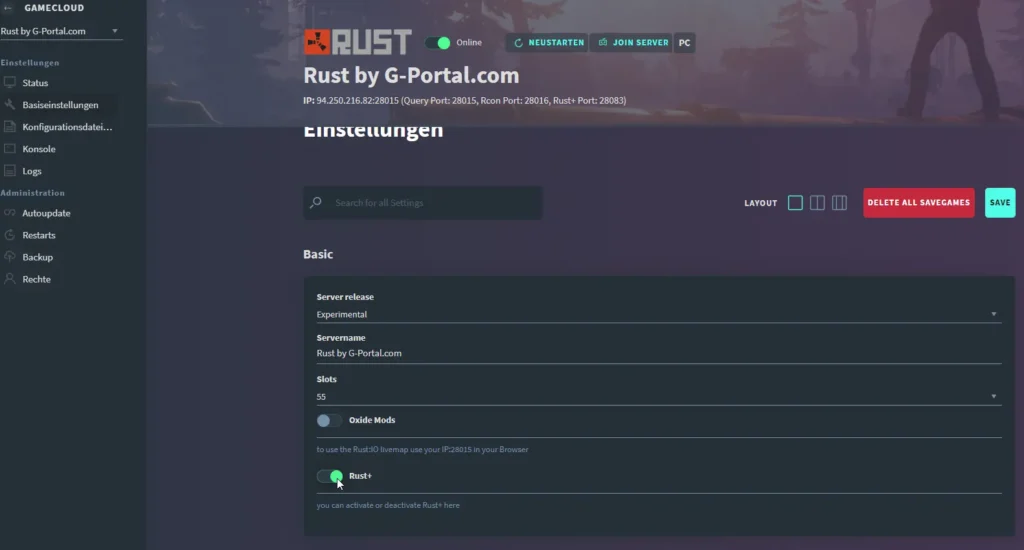
5. Restart G Portal Game Server:
Step 1: Log In to Your G Portal Account
- Open your web browser and go to the official G Portal website (www.g-portal.com). Log in to your G Portal account using your credentials (username and password).
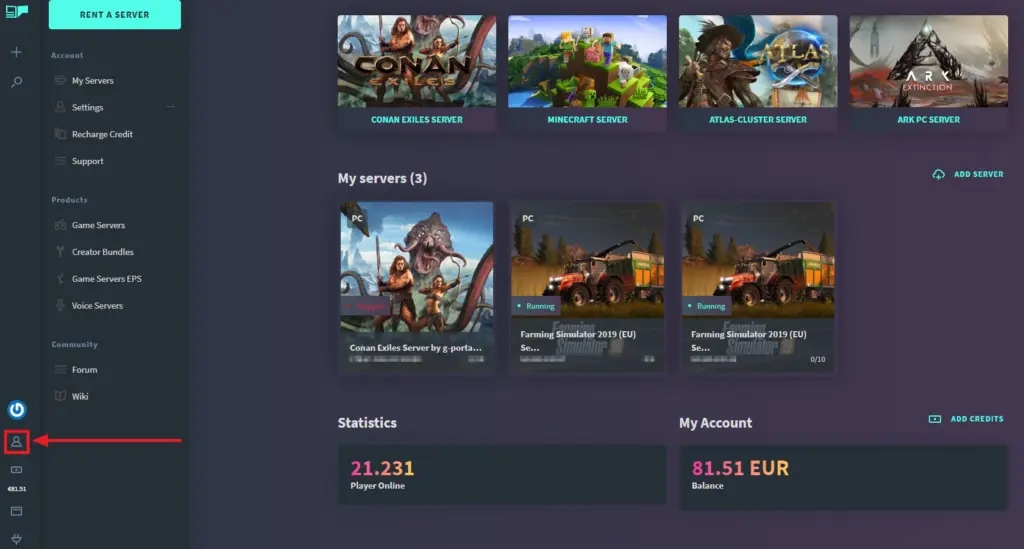
Step 2: Access Your Game Server Dashboard
- After logging in, you will be taken to your G Portal account dashboard. Look for a section or menu that pertains to “Game Servers” or “My Servers.” The exact wording may vary based on G Portal’s website design.
Step 3: Select Your Game Server
- In the Game Servers or My Servers section, you should see a list of the game servers you have. Locate the specific game server that you are encountering issues with and want to restart. Click on it to access the server dashboard.
Step 4: Initiate the Server Restart
- Within the game server dashboard, you should find options for managing your server. Look for a button or option related to “Restart,” “Reboot,” or “Stop/Start.” The wording can vary depending on the game and server type.
Step 5: Confirm the Restart
- When you click the restart option, the system will usually ask for confirmation. Confirm that you want to restart the server. This action will initiate the server’s reboot process.
Step 6: Wait for the Server to Restart
- The server will now go through the restart process. This may take a few moments to complete. During this time, the server’s status will change to “Restarting” or a similar indication.
Step 7: Verify Server Status
- After the server restarts, check the server’s status in the dashboard. It should change to “Online” or “Running” once the restart is complete.
Step 8: Test Your Connection
- Attempt to access your game server or the online service you were encountering issues with. The server restart often resolves temporary glitches or unresponsiveness.
Step 9: Monitor Server Stability
- Keep an eye on the server’s performance to ensure it remains stable after the restart. If you continue to experience issues, you may need to explore additional troubleshooting steps.
6. Update Game and Server Software:
Updating Your Game:
Step 1: Launch the Game
- Start by launching the game on your gaming device (PC, console, etc.) where you host or play on the G Portal server.
Step 2: Check for Game Updates
- Within the game’s main menu or settings, look for an option that allows you to check for updates. This option is usually located in the game’s settings, under a “Game Updates,” “Software Update,” or “Check for Updates” menu.
Step 3: Download and Install Updates
- If there are any available updates for your game, the system will prompt you to download and install them. Follow the on-screen instructions to complete the update process.
Step 4: Restart the Game
- After updating the game, it’s a good practice to restart the game to ensure that all changes take effect.
Updating Your G Portal Server:
Step 1: Log In to Your G Portal Account
- Open your web browser and go to the official G Portal website (www.g-portal.com). Log in to your G Portal account using your credentials (username and password).
Step 2: Access Your Game Server Dashboard
- Navigate to your game server dashboard within your G Portal account. Look for a section or menu related to “Game Servers” or “My Servers.” Click on it to access your server list.
Step 3: Select Your Game Server
- From your list of game servers, select the specific server that you want to update. Click on it to access the server’s dashboard.
Step 4: Check for Server Updates
- Within the server dashboard, look for an option that allows you to check for server updates. This option may be labeled as “Update Server” or something similar.
Step 5: Initiate the Server Update
- Click on the “Update Server” or equivalent option to start the update process for your G Portal game server.
Step 6: Wait for the Update to Complete
- The server update process may take some time, depending on the size of the update and your server’s specifications. Wait patiently for the update to finish.
Step 7: Verify the Server Status
- After the update is complete, check the server’s status within the dashboard. It should indicate that the server is “Online” or “Running.”
Step 8: Test the Server
- Attempt to access your G Portal game server or the online service associated with it to ensure that the update resolved any compatibility issues.
Step 9: Monitor Server Performance
- Keep an eye on the server’s performance after the update to ensure it remains stable and error-free.
7. Contact G Portal Support:
Step 1: Gather Information
- Before contacting G Portal support, gather all the relevant information about the error and the steps you’ve taken to troubleshoot it. This may include error messages, the server name, your account details, and a summary of the issue.
Step 2: Visit the G Portal Website
- Open your web browser and visit the official G Portal website (www.g-portal.com).
Step 3: Access the Support Section
- Look for a “Support,” “Help,” or “Contact Us” section on the G Portal website. This is where you’ll find information on how to get in touch with their support team. It’s often located in the website’s header or footer.
Step 4: Choose Contact Method
- In the support section, you’ll typically find multiple contact options, such as email, live chat, or a support ticket system. Choose the method that you’re most comfortable with or that is available based on G Portal’s support options at the time.
Step 5: Fill Out the Contact Form or Start a Chat
- If using a contact form, fill out the required information, including your name, email address, and a description of the issue. Be as detailed as possible in your description, providing information about the error, your server, and the troubleshooting steps you’ve taken.
- If using live chat, initiate a chat session with a support representative and explain your issue in the chat.
Step 6: Attach Screenshots or Logs (if applicable)
- If you have screenshots of error messages or server logs, attach them to your support request. This can help the support team better understand the problem.
Step 7: Submit the Request
- After filling out the contact form or explaining your issue in live chat, submit your support request. You will typically receive an acknowledgment that your request has been received.
Step 8: Wait for a Response
- G Portal’s support team will review your request and may reach out to you via email or the live chat platform. Response times may vary depending on their workload, but they will aim to assist you as soon as possible.
Step 9: Follow Support Instructions
- Once you receive a response from G Portal support, carefully follow any instructions or guidance provided by their technicians. They may ask for additional information or provide steps to resolve the issue.
Step 10: Keep Communication Open
- Maintain open communication with G Portal support as they work to resolve your issue. Provide any requested information promptly, and let them know if the issue persists or if there are any changes.
Step 11: Confirm Resolution
- After the support team has addressed the issue, test your G Portal server or access the online service to confirm that the “G Portal Server Not Responding Error” has been resolved.
8. Check Mods and Plugins:

Step 1: Log In to Your G Portal Account
- Open your web browser and visit the official G Portal website (www.g-portal.com). Log in to your G Portal account using your credentials (username and password).
Step 2: Access Your Game Server Dashboard
- Navigate to your game server dashboard within your G Portal account. Locate the server for which you want to check and potentially disable mods or plugins. Click on it to access the server’s dashboard.
Step 3: Identify Installed Mods or Plugins
- In the server dashboard, look for a section or option that displays the list of mods or plugins currently installed and active on your game server. The location of this section can vary depending on the game and server type.
Step 4: Disable Mods or Plugins
- Review the list of installed mods or plugins and identify any that you suspect may be causing issues. This could include mods or plugins that were recently added or those that have known compatibility issues.
- To disable a mod or plugin, look for an option next to each one, such as “Disable,” “Deactivate,” or “Unsubscribe.” Click on this option to turn off the mod or plugin.
Step 5: Restart the Server
- After disabling the mods or plugins, initiate a server restart. Look for an option within the server dashboard that allows you to restart the server. Restarting the server is essential to apply the changes.
Step 6: Test the Server
- Once the server has restarted, test its responsiveness by attempting to access it in the game or online service. Check if the “G Portal Server Not Responding Error” has been resolved.
Step 7: Monitor Server Performance
- Keep an eye on the server’s performance after disabling the mods or plugins. Ensure that the server remains stable and functional without the previously encountered issues.
Step 8: Identify Problematic Mods or Plugins
- If disabling mods or plugins resolved the issue, you’ll need to identify which specific mod or plugin was causing the problem. Re-enable them one at a time and test the server after enabling each one. This process will help you pinpoint the problematic mod or plugin.
Step 9: Update or Find Alternatives
- For any mods or plugins that are causing issues, consider updating them to their latest versions if available. Sometimes, newer versions resolve compatibility problems.
- If an update is not available or does not resolve the issue, you may need to find alternatives or replacements for the problematic mods or plugins. Look for options that are known to work well with your game and server version.
Step 10: Maintain a Stable Mod or Plugin Set
- Once you’ve identified stable mods or plugins and resolved any conflicts, maintain a stable set of mods or plugins on your game server. Regularly check for updates and compatibility with each game or server update to avoid future issues.
9. Optimize Server Settings:
Step 1: Log In to Your G Portal Account
- Open your web browser and visit the official G Portal website (www.g-portal.com). Log in to your G Portal account using your credentials (username and password).
Step 2: Access Your Game Server Dashboard
- Navigate to your game server dashboard within your G Portal account. Locate the server for which you want to optimize the settings. Click on it to access the server’s dashboard.
Step 3: Access Server Configuration
- Look for an option or section within the server dashboard that allows you to configure server settings. This section may be labeled as “Settings,” “Configuration,” or something similar.
Step 4: Review Player Slots
- One of the crucial settings to review is the number of player slots. Assess whether the current number of player slots is appropriate for your server’s capacity and performance. Adjust it based on your server’s hardware capabilities and intended gameplay experience.
Step 5: Examine World Size and Settings
- Review the world size and settings for your game server. Some games allow you to adjust the size of the game world and various in-game settings. Consider whether the world size is suitable for the number of players and the type of gameplay you want to offer.
Step 6: Adjust Resource Allocation
- Check if your server allows you to allocate resources such as CPU and RAM. Ensure that the allocation is appropriate for your server’s performance needs. Overallocating or underallocating resources can lead to server unresponsiveness.
Step 7: Save Configuration Changes
- After making adjustments to the server settings, be sure to save your changes. Look for a “Save” or “Apply” button within the server configuration section and click it.
Step 8: Restart the Server
- To apply the newly optimized settings, initiate a server restart. Find an option within the server dashboard that allows you to restart the server. Restarting is essential to ensure the changes take effect.
Step 9: Test the Server
- After the server has restarted with the optimized settings, test its responsiveness by attempting to access it in the game or online service. Check if the “G Portal Server Not Responding Error” has been resolved and if the server performance has improved.
Step 10: Monitor Server Performance
- Keep an eye on the server’s performance after optimizing the settings. Ensure that it remains stable and responsive over time. Continue to adjust settings as needed to maintain optimal performance.
Step 11: Consider Professional Support (Optional)
- If you are unsure about the optimal settings for your server or if you encounter specific performance issues, you may consider reaching out to G Portal’s support team or consulting with server administration professionals for expert guidance.
10. Test from Another Device:
Step 1: Identify Another Device
- Choose another device that is capable of connecting to the internet and running the game or accessing the online service hosted on your G Portal server. This device could be another computer, a mobile device, a tablet, or any suitable device.
Step 2: Ensure Network Connectivity
- Ensure that the chosen device has a working internet connection. This can be a Wi-Fi connection or a wired connection, depending on the device’s capabilities and your network setup.
Step 3: Install Necessary Software (if applicable)
- If the game or online service requires specific software or apps to connect to the G Portal server, ensure that they are installed on the chosen device.
Step 4: Access the G Portal Server
- Launch the game or open the web browser on the second device. Use the appropriate credentials or settings to connect to your G Portal server. This may involve entering the server IP address, port number, or any other necessary details.
Step 5: Test Connectivity
- Once you’ve connected to the G Portal server from the second device, test its responsiveness. This can involve joining the game, accessing the online service, or performing any actions that would typically interact with the server.
Step 6: Observe the Results
- Pay close attention to the results of your test. If the server is responsive and functions correctly on the second device, it suggests that the issue may be specific to the original device you were using. In this case, the problem could be related to that device’s configuration, software, or network settings.
Step 7: Compare Device-Specific Settings
- If the server works on the second device but not on the original device, compare the settings and configurations between the two devices. Look for any differences that could explain the issue on the original device.
Step 8: Check Network Connectivity on the Original Device
- If the second device also experiences issues connecting to the G Portal server, it indicates that the problem may be related to the server itself or the network rather than the specific device. In this case, proceed with further troubleshooting steps to address the issue.
11. Use a Wired Connection (For Game Servers):
Step 1: Prepare the Equipment
- Before making the switch, you’ll need the following equipment:
- A computer or server hosting the game server.
- An Ethernet cable (also known as a network cable or LAN cable).
- An available Ethernet port on both your computer/server and your network router or modem.
Step 2: Shut Down the Server (if necessary)
- If your game server is currently running on your computer or server, it’s a good practice to shut it down temporarily before making network changes. This ensures a smoother transition.
Step 3: Locate an Ethernet Port
- Locate an Ethernet port on your computer/server. It is typically found on the back of the device. It looks like a slightly larger phone jack.
Step 4: Connect the Ethernet Cable
- Take one end of the Ethernet cable and insert it into the Ethernet port on your computer/server. Ensure it clicks into place securely.
Step 5: Locate Your Router/Modem
- Find the router or modem that provides your internet connection. This is the device that your Wi-Fi network is connected to.
Step 6: Locate an Available Ethernet Port on the Router/Modem
- Examine the router or modem to find an available Ethernet port. These ports are usually labeled as LAN, Ethernet, or numbered (e.g., LAN1, LAN2).
Step 7: Connect the Other End of the Ethernet Cable
- Take the other end of the Ethernet cable (the one that is not connected to your computer/server) and insert it into the available Ethernet port on the router/modem.
Step 8: Secure the Cable
- Ensure that the Ethernet cable is securely plugged into both your computer/server and the router/modem. You should feel a slight click when it’s properly connected.
Step 9: Power On Your Server
- If you shut down your game server in Step 2, power it back on now.
Step 10: Configure Network Settings (if needed)
- In some cases, your computer/server may automatically detect the wired connection and configure the network settings accordingly. However, if you encounter network issues, you may need to adjust the network settings on your computer/server to use the wired connection. This can include setting it to obtain an IP address automatically (DHCP) or configuring a static IP address.
Step 11: Test Your Server
- Once the wired connection is established and any necessary network settings are configured, test your game server’s functionality. Ensure that it is responsive and functioning as expected.
Step 12: Monitor Performance
- Keep an eye on the server’s performance to ensure that the wired connection provides the stability and reduced latency you were aiming for. You should notice improved stability compared to a Wi-Fi connection, which can be especially beneficial for hosting game servers.
12. Investigate Modem and Router Settings:
Step 1: Gather Necessary Information
- Before you begin, collect the following information:
- The make and model of your router and modem.
- Your router’s IP address (commonly 192.168.1.1 or 192.168.0.1, but it can vary).
- Your router’s administrator username and password.
Step 2: Access Router Settings
- Open a web browser on a device connected to your network. In the address bar, type your router’s IP address and press Enter. This should take you to your router’s login page.
Step 3: Log In to Your Router
- Enter the router’s administrator username and password when prompted. These credentials are often found on a label on your router or in the router’s manual. If you’ve changed these credentials, use the ones you set.
Step 4: Locate Port Forwarding Settings
- Once logged in, navigate to the port forwarding or NAT settings section of your router. The location and wording of these settings can vary depending on your router’s brand and model. Look for terms like “Port Forwarding,” “Port Mapping,” or “NAT Configuration.”
Step 5: Add Port Forwarding Rules
- In the port forwarding section, you’ll need to create rules to forward specific ports to your G Portal game server. Typically, you’ll need to specify the following information for each rule:
- Service Name: Give your rule a descriptive name, e.g., “G Portal Server.”
- Internal IP Address: Enter the internal IP address of the computer or server hosting your G Portal game server. You can find this in your server’s network settings.
- External Port Range: Specify the range of ports you want to forward (e.g., 27015-27016 for many game servers).
- Protocol: Select the protocol used by your game server (usually TCP/UDP or both).
Step 6: Save the Settings
- After entering the port forwarding details, save the settings. This step may differ depending on your router’s interface, but there is usually a “Save” or “Apply” button to confirm the changes.
Step 7: Test Your G Portal Server
- Restart your G Portal game server if it’s currently running. Then, test the server’s responsiveness from an external device (not on your local network) to ensure that the port forwarding rules are correctly set up.
Step 8: Monitor Server Performance
- Keep an eye on the server’s performance to ensure that port forwarding has resolved the issue and that your server is responsive and stable.
Step 9: Contact Router Manufacturer (if needed)
- If you encounter difficulties configuring port forwarding or if your router’s interface is significantly different from the standard, consider reaching out to your router manufacturer’s support for assistance. They can provide guidance specific to your router model.
13. Monitor Server Resources:

Step 1: Log In to Your G Portal Account
- Open your web browser and visit the official G Portal website (www.g-portal.com). Log in to your G Portal account using your credentials (username and password).
Step 2: Access Your Game Server Dashboard
- Navigate to your game server dashboard within your G Portal account. Locate the server for which you want to monitor and optimize resource usage. Click on it to access the server’s dashboard.
Step 3: Monitor Resource Usage
- Within the server dashboard, look for a section or option that displays resource usage statistics. This may include information about CPU usage, RAM (memory) usage, and storage (disk) space usage.
Step 4: Identify Resource Bottlenecks
- Analyze the resource usage statistics to identify any resource bottlenecks. Look for resource usage that is consistently high or approaching the server’s limits. Common indicators of resource issues include:
- High CPU usage, indicating that the server is processing tasks at or near its capacity.
- High RAM usage, which can lead to performance degradation or server crashes.
- Low available storage space, which can affect the server’s ability to save data or updates.
Step 5: Optimize Resource Usage
- To optimize resource usage, consider the following steps:
- Remove unnecessary mods or plugins that consume resources.
- Reduce the number of player slots if your server frequently reaches maximum capacity.
- Adjust in-game settings to reduce resource-intensive elements.
- Limit the number of concurrent server processes or tasks.
- Delete unused or temporary files to free up storage space.
Step 6: Restart the Server
- After making resource optimization changes, initiate a server restart. Find an option within the server dashboard that allows you to restart the server. Restarting is essential to apply the resource-saving changes.
Step 7: Test the Server
- Once the server has restarted with optimized resource settings, test its responsiveness by attempting to access it in the game or online service. Check if the “G Portal Server Not Responding Error” has been resolved and if the server performance has improved.
Step 8: Monitor Performance
- Continuously monitor the server’s performance to ensure that the resource-saving measures are effective in maintaining server stability and responsiveness.
Step 9: Consider Upgrading Your Plan (if needed)
- If resource usage remains consistently high and optimization measures do not resolve the issue, it may be time to consider upgrading your G Portal server plan to one with more resources, such as a higher CPU, RAM, or storage allocation.
Step 10: Contact G Portal Support (if needed)
- If you encounter difficulties optimizing resource usage or if server performance issues persist, consider reaching out to G Portal support for assistance. They can provide guidance and recommendations based on your specific server and usage patterns.
14. Test During Off-Peak Hours:
Step 1: Identify Off-Peak and Peak Hours
- First, you need to determine when your off-peak and peak hours are. Off-peak hours are typically periods when there is minimal user activity on your website or application. Peak hours, on the other hand, are when the most users are accessing your server. These times can vary depending on your target audience and the nature of your service.
Step 2: Monitor Server Performance During Off-Peak Hours
- During off-peak hours, use monitoring tools to assess your server’s performance. This includes:
- CPU Usage: Check how much of your server’s processing power is being utilized.
- Memory Usage: Monitor the amount of RAM being used.
- Network Traffic: Analyze incoming and outgoing data traffic.
- Disk Usage: Evaluate the space used on your server’s storage devices.
- Response Time: Measure how quickly your server responds to requests.
Step 3: Run Load Tests During Off-Peak Hours
- To simulate peak traffic, use load testing tools to generate traffic on your server during off-peak hours. This will help you understand how your server behaves under stress. Pay attention to the following:
- Concurrent Users: Determine how many users your server can handle simultaneously.
- Response Time: Measure response times under heavy load.
- Error Rate: Note any errors or failed requests.
Step 4: Analyze Off-Peak Performance
- After collecting data during off-peak hours, analyze the results. If your server performs well with low resource utilization, it may not be adequately provisioned for peak traffic.
Step 5: Identify Performance Issues During Peak Hours
- During peak hours, closely monitor your server’s performance in real-time. Use the same metrics as in step 2 to assess the situation. Look for signs of:
- Slow response times.
- Increased error rates.
- High resource utilization.
Step 6: Take Immediate Action During Peak Issues
- If you notice performance issues during peak hours, consider taking immediate action to mitigate the problems:
- Scale Resources: If your server is running out of resources, consider upgrading your hosting plan, adding more server instances, or optimizing existing resources.
- Caching: Implement caching mechanisms to reduce the load on your server and improve response times.
- Load Balancing: Distribute traffic across multiple server instances to ensure even distribution of requests.
- Content Delivery Network (CDN): Use a CDN to serve static content closer to users, reducing server load.
- Database Optimization: Optimize database queries and indexes to reduce database load.
Step 7: Long-Term Solutions
- Once you’ve addressed immediate peak-hour issues, think about long-term solutions to ensure consistent server performance during high-traffic times:
- Autoscaling: Implement autoscaling to automatically adjust server resources based on demand.
- Performance Testing: Continuously perform load testing to identify potential bottlenecks.
- Regular Maintenance: Keep your server software and configurations up-to-date.
- Monitoring: Use monitoring tools to proactively detect and respond to performance issues.
15. Run a Ping Test:
Step 1: Open the Command Prompt or Terminal
- On Windows:
- Press the
Windowskey, type “Command Prompt,” and pressEnterto open it.
- Press the
- On macOS:
- Press
Cmd + Space, type “Terminal,” and pressEnterto open it.
- Press
- On Linux:
- Open your preferred terminal emulator.
Step 2: Run the Ping Command
In the terminal window, type the following command, replacing [G Portal Server IP] with the actual IP address or hostname of the G Portal server you want to test:

For example, if the G Portal server’s IP address is 123.45.67.89, you would run:

Step 3: Interpret the Ping Results
The ping command will start sending packets to the specified server and display the results. Here’s what to look for:
- Reply from [G Portal Server IP]: This indicates that the server responded to the ping request. You should see multiple lines with “Reply” messages.
- Round-Trip Time (RTT): The RTT is the time it takes for a packet to travel from your computer to the server and back. It is measured in milliseconds (ms). Look at the “time” values in each line to see the RTT for each packet.
- Packet Loss: Ideally, you should see no packet loss. If you notice lines that say “Request timed out” or “% packet loss,” it means some packets were lost during the test.
Step 4: Analyze the Results
Here’s what the ping results can tell you:
- Low RTT: A low and consistent RTT indicates a good, responsive connection. This is what you want to see.
- High RTT: If you see consistently high RTT values, it may indicate network congestion or issues with the G Portal server’s connectivity. It could affect the responsiveness of your server.
- Packet Loss: Packet loss can lead to data retransmissions, which can result in slow or unresponsive connections. Even a small amount of packet loss can be problematic.
Step 5: Take Action
If you encounter high RTT values or packet loss in your ping test results, here are some actions you can consider:
- Check your internet connection: Ensure that your local network is stable and not experiencing issues.
- Contact your hosting provider: If the G Portal server is hosted externally, contact your hosting provider’s support team to report the issue and seek their assistance.
- Consider using a VPN: If the issue persists, you might try connecting to the server through a VPN service to see if it improves the connection.
- Test from a different location: Running the ping test from a different physical location or network can help you determine if the issue is specific to your network.
16. Restart Your Computer or Device:
Step 1: Save Your Work
- Before restarting your computer or device, make sure to save any open files or work in progress to prevent data loss.
Step 2: Close All Applications
- Close all open applications and programs running on your computer or device. This ensures that no background processes interfere with the restart.
Step 3: Windows OS Restart (PC)
- If you’re using a Windows PC, follow these steps to restart:
- Click the “Start” button or press the Windows key on your keyboard.
- Click the “Power” button in the Start menu.
- Choose “Restart” from the dropdown menu.
- Confirm the restart if prompted.
Step 4: macOS Restart (Mac)
- If you’re using a Mac, follow these steps to restart:
- Click the Apple menu in the top-left corner of the screen.
- Select “Restart.”
Step 5: iOS Device Restart (iPhone or iPad)
- To restart an iPhone or iPad, follow these steps:
- Press and hold the side or top button (depending on your device) and one of the volume buttons simultaneously.
- Hold them until the “slide to power off” slider appears on the screen.
- Swipe the slider to turn off your device.
- After your device is fully powered off, press and hold the side or top button again until the Apple logo appears, indicating that the device is restarting.
Step 6: Android Device Restart
- To restart an Android device, follow these steps:
- Press and hold the power button until the power menu appears on the screen.
- Tap “Restart” or “Reboot,” depending on your device’s version.
- Confirm the restart if prompted.
Step 7: Wait for the Device to Restart
- Allow your computer or device to complete the restart process. This may take a few moments.
Step 8: Test Your Network and Services
- After the restart is complete, reconnect to your network (Wi-Fi or Ethernet) if necessary. Test the network connection by accessing websites, online services, or the game server to check if the issue has been resolved or not.
Step 9: Monitor for Stability
- Keep an eye on the stability of your network connection and services. Ensure that the issue does not recur and that your computer or device functions as expected.
17. Check for Server Region and Location:

Step 1: Log into Your G Portal Account
- Visit the G Portal website (https://www.g-portal.com/) and log in to your account. If you don’t have an account, sign up for one.
Step 2: Access Your Server Dashboard
- Once you’re logged in, navigate to your server dashboard. This is where you can manage your G Portal server settings.
Step 3: Check the Current Server Location
- Within your server dashboard, look for information about your server’s current location or region settings. G Portal typically provides options for server locations in various regions or data centers.
Step 4: Analyze Your Target Audience
- Understand where your primary user base is located. This information can usually be obtained from website or game analytics. You want to choose a server location that minimizes latency for the majority of your users.
Step 5: Evaluate Server Locations
- In your server dashboard, check if there are alternative server locations available. G Portal often offers servers in different regions or countries.
Step 6: Select a New Server Location
- If a more suitable server location is available, select it as the new location for your server. This process may vary depending on G Portal’s interface, but it’s typically straightforward.
Step 7: Confirm the Location Change
- After selecting the new location, you’ll likely need to confirm the change. Review any associated costs or potential downtime.
Step 8: Save and Apply Changes
- Once you’ve confirmed the server location change, save and apply the changes. This will initiate the process of migrating your server to the new location.
Step 9: Monitor Server Performance
- After the migration is complete, closely monitor your server’s performance. Pay attention to response times and overall server stability.
Step 10: Communicate with Users
- If your server’s IP address or location changes, communicate this to your user base. This is especially important for online communities or gaming servers so that your users are aware of the new server address.
Step 11: Performance Optimization
- Continue to monitor server performance and make adjustments as needed. If you notice significant improvements or issues, take action accordingly.
Step 12: Consider Redundancy
- If your user base is spread across multiple regions, consider setting up multiple servers in different locations or using a content delivery network (CDN) to further optimize response times and redundancy.
18. Disable VPN and Proxy:
Step 1: Locate VPN or Proxy Software
- If you are using a VPN or proxy service, it is typically managed through specific software or settings on your computer or device. Locate this software or settings, as you’ll need to access them to disable the VPN or proxy.
Step 2: Disable VPN
- If you’re using a VPN service, follow these steps to disable it:
- Open the VPN software or app that you are using.
- Look for an option to disconnect or turn off the VPN connection.
- Click on the “Disconnect” or “Turn Off” button to disable the VPN. This action will return your internet connection to its regular state.
Step 3: Disable Proxy Settings (Windows PC)
- If you’ve configured a proxy server on your Windows PC, here’s how to disable it:
- Press the Windows key + I on your keyboard to open the Settings app.
- Click on “Network & Internet.”
- In the left sidebar, select “Proxy.”
- Under the “Manual proxy setup” section, toggle off the switch that says “Use a proxy server.”
- Close the Settings app.
Step 4: Disable Proxy Settings (macOS)
- To disable a proxy server on a macOS computer, follow these steps:
- Click the Apple menu in the top-left corner.
- Select “System Preferences.”
- Choose “Network.”
- Select your active network connection (e.g., Wi-Fi or Ethernet) from the left sidebar.
- Click the “Advanced” button.
- Go to the “Proxies” tab.
- Uncheck any boxes related to proxy settings.
- Click “OK” to save the changes.
Step 5: Test Server Connectivity
- After disabling the VPN or proxy, test your server connectivity by attempting to access the G Portal server or the online service. Check if the issue, such as the “G Portal Server Not Responding Error,” has been resolved.
Step 6: Monitor for Stability
- Keep an eye on the stability of your server connection and online activities. Ensure that the issue does not reoccur and that your server remains responsive.
Step 7: Enable VPN or Proxy (if needed)
- If you disabled the VPN or proxy for troubleshooting purposes and now need to use it for other purposes, simply reverse the steps to enable it again.
19. Verify Server Mod Compatibility:
Step 1: List Installed Mods
- Log in to your game server’s control panel and create a list of all the mods that are currently installed. Note their names, versions, and any additional details that might be relevant.
Step 2: Check Official Mod Documentation
- Visit the official websites or mod pages for each installed mod. Look for documentation, FAQs, or compatibility information provided by the mod authors. They often specify which game versions and other mods are compatible with their creations.
Step 3: Verify Game Version Compatibility
- Ensure that the mods are compatible with the latest version of the game you’re running on your server. Mod authors frequently update their mods to be in sync with new game releases. If a mod isn’t compatible with the current game version, you may encounter issues.
Step 4: Review Mod Descriptions and Release Notes
- Carefully read the descriptions and release notes for each mod. Mod authors sometimes include compatibility information, known conflicts, and recommended load order. Take note of any special instructions or requirements.
Step 5: Visit Modding Communities
- Join modding communities or forums related to the game you’re hosting. These forums are excellent resources for discussing mod compatibility and seeking advice from experienced modders.
Step 6: Update Mods
- Check if there are updates available for any of the mods you have installed. Mod updates often include bug fixes and compatibility improvements. Download and install the latest versions of the mods.
Step 7: Test Mods Together
- Create a local test environment or a separate server for testing purposes. Install all the mods you want to use on your main server in this test environment. Test how the mods interact with each other.
Step 8: Monitor Server Performance
- While testing, closely monitor your server’s performance. Keep an eye out for any signs of instability, crashes, or unusual behavior that may be caused by mod conflicts.
Step 9: Troubleshoot and Resolve Issues
- If you encounter issues during testing, troubleshoot them methodically. This might involve disabling specific mods one by one to identify the source of the conflict. Seek help from the modding community or the mod authors if necessary.
Step 10: Document Compatibility Information
- Maintain a comprehensive record of the compatibility status of each mod. Note which mods are known to work well together and any specific load order recommendations.
Step 11: Educate Players
- If you’re hosting a game server for others to join, make sure your players are aware of the compatible mod list and any special instructions for mod installation and usage.
Step 12: Periodically Reevaluate Compatibility
- Game updates and mod updates can introduce new compatibility issues. Regularly reevaluate the compatibility of your installed mods, especially after major game updates or new mod releases.
Step 13: Communicate with Mod Authors
- If you encounter persistent compatibility issues that you can’t resolve on your own, consider reaching out to the mod authors or the modding community for assistance. They may provide guidance or updates to address the problems.
20. Perform a Traceroute:
Step 1: Open the Command Prompt (Windows) or Terminal (macOS/Linux)
- On Windows:
- Press the Windows key.
- Type “cmd” or “Command Prompt” in the search bar.
- Press Enter to open the Command Prompt.
- On macOS:
- Click the magnifying glass icon in the top-right corner (Spotlight Search).
- Type “Terminal” and press Enter to open it.
- On Linux:
- Press Ctrl + Alt + T to open the Terminal.
Step 2: Run the Traceroute Command
- In the Command Prompt (Windows) or Terminal (macOS/Linux), type the following command:

Replace
<server IP address or domain>with the actual IP address or domain name of the G Portal server you are trying to troubleshoot. For example, if the server’s IP address is “192.168.1.1,” you would enter:
Step 3: Review the Traceroute Results
- The traceroute command will start to gather information about the network path to the specified server. It will display a list of network hops (routers) along the way, along with their IP addresses and response times (latency).
- Each line in the traceroute output represents a different hop in the network path. You’ll see a series of IP addresses or hostnames followed by response times in milliseconds (ms).
- Pay attention to the response times. High response times or asterisks (*) in place of response times may indicate network congestion or problems at that hop.
Step 4: Identify Network Bottlenecks
- Look for hops with consistently high response times or significant spikes in latency. These are potential network bottlenecks that could be causing the server unresponsiveness.
Step 5: Interpret the Results
- Interpret the traceroute results based on the following principles:
- The first hop is typically your local device or router.
- The subsequent hops represent intermediary routers between your device and the target server.
- High latency at intermediary hops can indicate network congestion or issues with those routers.
- Sometimes, a high-latency hop may be normal if it’s a remote server or if it’s located in a different region or country.
Step 6: Take Action
- Depending on the traceroute results, you can take the following actions:
- If you identify high-latency hops early in the traceroute, it may indicate a local network issue. Check your local network, including your Wi-Fi connection or Ethernet cable.
- If high-latency hops appear further along the traceroute, it could be an issue with the network infrastructure between your location and the G Portal server. In this case, contact your ISP for assistance or report the issue to G Portal’s support team.
Step 7: Save the Results (optional)
- You can save the traceroute results to a text file for future reference or to share with your ISP or G Portal support if needed. To save the results, use the following command (on Windows):

This will create a file named “traceroute_results.txt” with the traceroute output.
21. Test Other Online Services:
Step 1: Identify the Issue
- If you’re experiencing the “G Portal Server Not Responding Error,” it’s essential to determine whether it’s an isolated issue with the G Portal server or if other online services are also affected. Common signs of a broader issue include:
- Unable to access multiple websites or online services.
- Slow or intermittent internet connectivity across various platforms.
- Frequent disconnections from online games or applications.
Step 2: Test Multiple Online Services
- To test other online services, follow these steps:
- Open your web browser.
- Try accessing several different websites, such as popular news sites, search engines, social media platforms, and other online services that you regularly use.
- Verify if you can load these websites and access their content. Pay attention to any error messages or loading issues.
Step 3: Test Online Games or Applications
- If you play online games or use specific applications, test their functionality as well. Launch the games or apps and try to connect to their servers or services. Note if you encounter any connectivity issues or error messages.
Step 4: Check for Consistency
- Ensure that the issues persist consistently across multiple online services and platforms. If you experience problems with several websites or applications, it indicates a potential broader connectivity issue.
Step 5: Contact Your ISP
- If you find that multiple online services are unresponsive or experiencing connectivity issues, it’s likely that the problem is related to your internet connection or ISP. Contact your ISP’s customer support or technical support team to report the issue and seek assistance.
Step 6: Provide Details to Your ISP
- When contacting your ISP, be prepared to provide the following details:
- A description of the issue (e.g., inability to access multiple online services, slow internet).
- The error messages, if any, that you encountered.
- Any troubleshooting steps you’ve already taken.
- Your account information with the ISP (e.g., account number, customer ID).
- Your contact information for follow-up.
Step 7: Follow ISP Guidance
- Follow the guidance provided by your ISP’s support team. They may perform diagnostics on your connection, remotely reset your modem or router, or schedule a technician visit if necessary.
Step 8: Monitor for Resolution
- After reporting the issue to your ISP and following their instructions, monitor your internet connection and online services for improvements. The ISP’s technical team will work to resolve the problem, and it may take some time for the issue to be completely resolved.
22. Test on Different Browsers:
Step 1: Prepare a List of Web Browsers
- Before you start testing, make a list of web browsers you want to test your G Portal server with. Common browsers include Google Chrome, Mozilla Firefox, Microsoft Edge, Safari, and Opera.
Step 2: Access the G Portal Server
- Open your preferred web browser and enter the URL or IP address of your G Portal server in the browser’s address bar. Press Enter to access the server’s control panel or website.
Step 3: Perform Basic Functionality Tests
- Once you’re on the G Portal server’s control panel or website, perform basic functionality tests such as logging in, navigating through different sections, and interacting with the server settings. Make note of any issues you encounter.
Step 4: Clear Browser Cache and Cookies
- Before switching to the next browser, it’s a good practice to clear the cache and cookies of the current browser. This ensures that you’re starting with a clean slate in each browser.
Step 5: Repeat Steps 2-4 for Each Browser
- Open the next web browser from your list and repeat Steps 2 to 4 for each browser on your list. Test the same actions and functionalities you tested in the previous browser.
Step 6: Document the Results
- As you test with each browser, document your findings. Note any issues that are specific to a particular browser, such as display problems, functionality errors, or unexpected behaviors.
Step 7: Compare Results
- After testing with all the browsers on your list, compare the results. Determine if the issues you encountered were consistent across all browsers or if they were isolated to specific ones.
Step 8: Investigate Browser-Specific Issues
- If you identified browser-specific issues, investigate further to understand the root causes. These issues might be related to browser compatibility, JavaScript errors, or other factors.
Step 9: Check for Browser Updates
- Ensure that the browsers you tested are up to date. Outdated browsers can have compatibility issues. If a particular browser version exhibits problems, check if there is a newer version available and retest.
Step 10: Consult Browser Compatibility Resources
- If you’re unable to resolve browser-specific issues on your own, consult browser compatibility resources provided by G Portal or the web application you’re hosting. These resources may include guidelines or known issues related to specific browsers.
Step 11: Implement Fixes or Workarounds
- Based on your investigation and the resources you consulted, implement fixes or workarounds for browser-specific issues. This may involve adjusting server settings, updating your web application, or using compatibility libraries.
Step 12: Retest
- After implementing fixes or workarounds, retest your G Portal server using the same set of browsers. Ensure that the issues have been resolved and that your server functions smoothly across all tested browsers.
Step 13: Communicate with Users
- If you’re hosting a web application for users, communicate any known browser compatibility issues and their resolutions to your users. Provide guidance on using the recommended browsers for the best experience.
23. Optimize In-Game Settings:
Step 1: Launch the Game
- Start by launching the game for which you want to optimize the settings. This guide assumes that you are already in the game’s main menu or a gameplay environment.
Step 2: Access the In-Game Settings Menu
- Most games have an in-game settings menu where you can adjust various options, including graphics settings. To access this menu, look for options like “Settings,” “Options,” or “Graphics Settings” within the game’s menu.
Step 3: Graphics Settings
- In the graphics settings menu, you’ll typically find several options that control the game’s visual quality and performance. Common graphics settings include:
- Resolution: Adjust the screen resolution to a lower setting. Lower resolutions require fewer resources but may result in reduced visual clarity.
- Graphics Quality/Detail: This setting controls the overall level of detail in the game. Lowering it reduces the strain on your system.
- Texture Quality: Reducing texture quality decreases the resolution and complexity of in-game textures.
- Shadows: Lower the shadow quality or disable shadows entirely, as rendering shadows can be resource-intensive.
- Anti-Aliasing: Decrease the level of anti-aliasing or turn it off. Anti-aliasing smooths jagged edges but can impact performance.
- Effects and Post-Processing: Adjust the level of special effects and post-processing, which can be demanding on your GPU.
- View Distance: Reducing the view distance limits how far you can see in the game world but can significantly improve performance.
- V-Sync (Vertical Sync): Disable V-Sync to allow your GPU to render frames as fast as possible. Enabling V-Sync can limit your frame rate to match your monitor’s refresh rate.
Step 4: Make Gradual Adjustments
- Start by making gradual adjustments to these settings. Lower one setting at a time and test the game’s performance by playing for a few minutes or observing server responsiveness.
Step 5: Monitor Frame Rate
- Many games provide an option to display your current frame rate (FPS) on-screen. Monitor your FPS as you make adjustments. A higher FPS indicates better performance.
Step 6: Balance Performance and Visual Quality
- Find a balance between performance and visual quality that suits your preferences and provides acceptable server responsiveness. Keep in mind that a smoother gaming experience is often more important than the highest graphics settings.
Step 7: Apply Settings and Restart Game
- After adjusting the settings to your satisfaction, apply the changes and restart the game if necessary. Some changes may require a game restart to take effect.
Step 8: Test Server Responsiveness
- Reconnect to the server or game and test its responsiveness. Ensure that the adjustments have improved the overall experience and reduced server-related errors like the “G Portal Server Not Responding Error.”
Step 9: Fine-Tune as Needed
- If you encounter further server issues or performance challenges, return to the in-game settings and continue fine-tuning. You can adjust individual settings up or down as needed to achieve the best balance between visuals and performance.
24. Investigate Server Hardware:
Step 1: Schedule Regular Hardware Inspections
- Establish a regular schedule for hardware inspections. Depending on your server’s criticality, this can be monthly, quarterly, or semi-annually.
Step 2: Plan Downtime
- If your server is actively in use, plan the hardware inspection during a scheduled maintenance window to minimize disruptions.
Step 3: Back Up Data
- Before starting any hardware inspection, ensure that all critical data on the server is backed up. This is a precaution in case you need to take the server offline or in case of unexpected data loss during the inspection.
Step 4: Turn Off and Unplug the Server
- Shut down the server properly from the operating system and then turn it off. Unplug the server from the power source to ensure safety during the inspection.
Step 5: Open the Server Chassis
- Depending on your server’s design, open the server chassis. This may involve removing screws or latches. Refer to your server’s manual or documentation for guidance.
Step 6: Visual Inspection
- Conduct a visual inspection of the internal components, paying attention to the following:
- Power Supply Unit (PSU): Check for any signs of overheating, damage, or loose cables.
- Motherboard: Inspect for loose or damaged components, such as capacitors or connectors.
- CPU and Heat Sink: Ensure that the CPU is securely in its socket and that the heat sink/fan assembly is clean and properly seated.
- RAM Modules: Verify that RAM modules are correctly installed and that there are no visible issues.
- Storage Drives: Examine hard drives or SSDs for any physical damage or loose connections.
- Expansion Cards: Inspect any PCIe cards for proper seating and connections.
- Cabling: Check all internal cables for wear, damage, or disconnection.
- Fans: Ensure that all fans are clean, free of obstructions, and functioning properly.
- Dust: Remove any dust or debris from components and fans using compressed air or an ESD-safe brush.
Step 7: Check Error Logs
- Review the server’s error logs or event logs for any hardware-related errors or warnings. These logs can provide valuable insights into potential issues.
Step 8: Replace Faulty Components
- If you identify any hardware components that are visibly damaged or malfunctioning, plan for their replacement. Ensure that you have suitable replacement parts on hand.
Step 9: Update Firmware and Drivers
- While the server is offline, consider updating the server’s firmware (BIOS/UEFI) and device drivers. This can help improve hardware stability and performance.
Step 10: Close and Secure the Chassis
- After completing the inspection, close and secure the server chassis. Make sure all components are properly reseated, cables are connected securely, and there are no loose parts.
Step 11: Power On and Test
- Power on the server and monitor its startup process. Verify that it boots up without any errors or issues. Run hardware diagnostics tools if available to perform a comprehensive test.
Step 12: Restore Data and Services
- If the server passes the hardware inspection and testing, restore any data and services that were temporarily backed up or taken offline.
Step 13: Document the Inspection
- Maintain a record of the hardware inspection, including any issues found, actions taken, and the date of the inspection. This documentation is essential for future reference and troubleshooting.
25. Seek Professional Help:
Step 1: Prepare Relevant Information
- Before seeking professional help, gather all relevant information and documentation related to the issue. This may include:
- Details of the error message or problem you’re encountering.
- A summary of the troubleshooting steps you’ve already attempted.
- Any logs or error reports generated by the server or the game.
- Information about your server setup, including hardware specifications and configurations.
- Your contact information, including email address and phone number.
Step 2: Research and Identify Professionals
- Look for professionals with expertise in server administration, network troubleshooting, or IT support. You can find them through various means, such as:
- Local IT service providers or consulting firms.
- Online platforms for IT freelancers or consultants.
- Recommendations from gaming communities or forums.
- Referrals from friends or colleagues who may have experience with IT professionals.
Step 3: Contact Professionals
- Reach out to the professionals you’ve identified to discuss your server-related issue. You can contact them through email, phone, or their preferred communication channels. Be clear and concise when describing your problem and your attempts at troubleshooting.
Step 4: Provide Information and Documentation
- Share all the information and documentation you’ve prepared with the professional. This will help them understand the context and nature of the issue more effectively.
Step 5: Schedule a Consultation or Diagnostic Session
- Arrange a consultation or diagnostic session with the professional. This can be done remotely via video call or on-site, depending on your preference and the professional’s availability.
Step 6: Discuss the Issue
- During the consultation or diagnostic session, explain the issue in detail to the professional. Answer any questions they may have and provide additional context if needed. Be open to their inquiries and suggestions.
Step 7: Allow the Professional to Investigate
- Depending on the complexity of the issue, the professional may need time to investigate and troubleshoot the problem. They may request access to your server or remote access to your system to perform diagnostic tests.
Step 8: Receive Recommendations or Solutions
- Once the professional has identified the root cause of the issue, they will provide you with recommendations, solutions, or a course of action to resolve the problem. This may involve making specific configurations, applying updates, or performing maintenance tasks.
Step 9: Implement Recommendations
- Follow the recommendations provided by the professional to address the server-related issue. Make sure to implement the solutions accurately and thoroughly.
Step 10: Test and Monitor
- After implementing the recommended solutions, thoroughly test the server and monitor its performance. Ensure that the issue has been successfully resolved and that server responsiveness has improved.
Step 11: Communicate with the Professional
- Maintain open communication with the professional throughout the resolution process. Provide feedback on the effectiveness of the solutions and report any further issues or concerns.
Step 12: Payment and Follow-Up
- Discuss payment terms and fees with the professional, and make any necessary payments according to the agreed-upon terms. Additionally, inquire about follow-up support or maintenance services if needed.
Frequently Asked Questions(FAQ’s)
How common is the “G Portal Server Not Responding Error”?
The “G Portal Server Not Responding Error” is relatively uncommon but can occur due to various reasons. Following the steps in this guide will help you resolve it quickly.
Can a slow internet connection cause this error?
Yes, a slow or disrupted internet connection can lead to the “G Portal Server Not Responding Error.” Ensure you have a stable internet connection.
What does it mean when a G Portal server is not responding?
It typically indicates that there is a connectivity issue between your client and the server, or the server may be experiencing problems.
Is server unresponsiveness common with G Portal servers?
It can happen occasionally due to various factors, but it’s not necessarily common. Frequent unresponsiveness may signal underlying issues.
How can I check if the server is down for everyone or just me?
Use online tools or websites that offer server status checks. These services can determine if the server is down globally or if it’s a localized issue.
Can mods or plugins cause server unresponsiveness?
Yes, some mods or plugins may conflict with each other or the server software, leading to unresponsiveness. Try disabling them to troubleshoot.
Should I restart my server immediately when it’s not responding?
It’s a good first step, but if the problem persists, you may need to investigate further or contact support.
How can I prevent server unresponsiveness in the future?
Regularly update server software, monitor for issues, and follow best practices for server management.
What should I do if my server is unresponsive during peak usage times?
Consider upgrading your server plan to handle higher traffic loads.
Is it possible for my internet connection to cause server unresponsiveness?
Yes, a poor or unstable internet connection can contribute to connectivity issues with the server.
Why do server logs matter when troubleshooting unresponsiveness?
Server logs can provide valuable information about errors or issues that may be causing the problem.
Is server unresponsiveness always fixable?
In most cases, server unresponsiveness is fixable with the right troubleshooting and intervention. However, it may require technical expertise.
Conclusion
Dealing with a G Portal server not responding error can be frustrating, but by following the troubleshooting methods mentioned above and seeking assistance when needed, you can often identify and resolve the underlying issues. Regular server maintenance and staying informed about server status and updates can help prevent such errors in the future.