

When it comes to browsing the internet, a stable and reliable internet connection is essential. However, Windows 10 users may sometimes encounter an error message stating “DNS Server Not Responding.” This issue can be frustrating as it disrupts your internet connectivity and prevents you from accessing websites. In this article, we will delve into the causes behind this error and provide you with effective solutions to resolve the DNS Server Not Responding problem in Windows 10.
Contents
- 1 Common Causes of DNS Servers Not Responding
- 1.1 How to Fix DNS Server Not Responding in Windows 10
- 1.1.1 Solution 1: Restart Your Router and Computer
- 1.1.2 Solution 2: Update Network Adapter Drivers
- 1.1.3 Solution 3: Flush DNS Cache & Reset DNS Setting
- 1.1.4 Solution 4: Change DNS Server Settings
- 1.1.5 Solution 5: Disable Firewall and Antivirus Temporarily
- 1.1.6 Solution 6: Start Your Computer in Safe Mode
- 1.1.7 Solution 7: Disable Secondary Connections
- 1.1.8 Solution 8: Disabling Peer-to-Peer Feature
- 1.1.9 Solution 9: Disable IPv6 in Windows
- 1.1.10 Solution 10: Contact Your Network Service Provider
- 1.2 FAQs about DNS Server Not Responding in Windows 10
- 1.2.1 Q1: Why does my Windows 10 computer show the DNS Server Not Responding error?
- 1.2.2 Q2: How can I update my network adapter drivers?
- 1.2.3 Q3: What are DNS server settings?
- 1.2.4 Q4: Can I change my DNS server settings in Windows 10?
- 1.2.5 Is it safe to temporarily disable my firewall and antivirus software?
- 1.2.6 What should I do if none of the solutions work?
- 1.3 Conclusion
Common Causes of DNS Servers Not Responding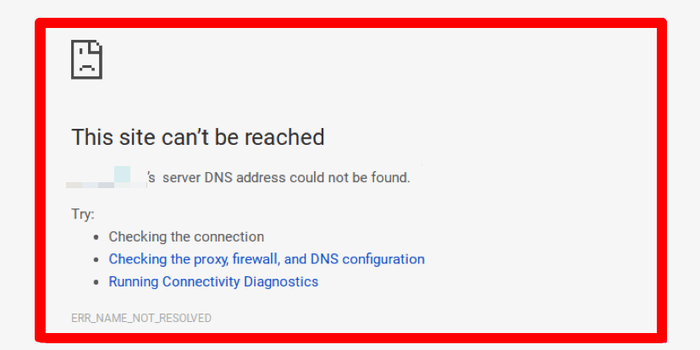
Outdated Network Adapter Drivers
One of the common reasons behind the DNS Server Not Responding error is outdated or faulty network adapter drivers. Network adapters facilitate the communication between your computer and the network. If the drivers are outdated, they may not function correctly, leading to connectivity issues. To resolve this, you need to update your network adapter drivers.
Incorrect DNS Server Settings
Another possible cause is incorrect DNS server settings. DNS servers translate domain names into IP addresses, allowing your computer to connect to websites. If the DNS server settings are misconfigured, your computer won’t be able to resolve domain names, resulting in the error message. Verifying and correcting the DNS server settings can help resolve this issue.
Firewall or Antivirus Interference
Sometimes, firewall or antivirus software can interfere with your network connection, causing the DNS Server Not Responding error. These security measures may incorrectly block DNS requests, preventing your computer from accessing the necessary servers. Temporarily disabling your firewall or antivirus software can help identify if they are the culprits behind the issue.
Network Service Provider Issues
Occasionally, the DNS Server Not Responding error may stem from network service provider issues. Your service provider’s DNS servers could be experiencing temporary outages or technical difficulties. In such cases, reaching out to your service provider can help you determine if the issue lies with them.
How to Fix DNS Server Not Responding in Windows 10
Now that we understand some of the common causes of the DNS Server Not Responding error, let’s explore various solutions to resolve this issue and restore your internet connectivity.
Solution 1: Restart Your Router and Computer
The simplest and often effective solution is to restart both your router and computer. This process clears any temporary network glitches and resets your network connections, potentially resolving the DNS Server Not Responding error. Start by turning off your router and computer. After a few minutes, power them back on and check if the issue persists.
Solution 2: Update Network Adapter Drivers
As mentioned earlier, outdated or faulty network adapter drivers can contribute to the DNS Server Not Responding errors. To update your network adapter drivers, follow these steps:
- Press Windows + X and select Device Manager from the menu.
- Expand the Network adapters category.

- Right-click on your network adapter and select Update driver.
- Choose Search automatically for updated driver software and let Windows search for the latest drivers.
- Follow the on-screen instructions to complete the update process.
Solution 3: Flush DNS Cache & Reset DNS Setting
Flushing the DNS cache can help resolve issues related to DNS server responses. Follow these steps to flush the DNS cache:
- Press Windows + X and select Command Prompt (Admin) or Windows PowerShell (Admin).
- In the command prompt, type the following command and press Enter: ipconfig /flushdns
- To reset run these commands after flush commands
- ipconfig /registerdns
- ipconfig /release
- Ipconfig /renew
- netsh winsock reset
Solution 4: Change DNS Server Settings
If the DNS server settings on your computer are incorrect, changing them to a reliable DNS server can help resolve the issue. Follow these steps to change your DNS server settings:
- Right-click on the network icon in the system tray and select Open Network & Internet settings.
- Click on Change adapter options.
- Right-click on your active network connection and select Properties.
- Select Internet Protocol Version 4 (TCP/IPv4) and click on Properties.
- Choose Use the following DNS server addresses and enter the preferred and alternate DNS server addresses. You can use public DNS servers such as Google DNS (8.8.8.8 for Preferred DNS server and 8.8.4.4 for Alternate DNS server) or any other DNS server of your choice.
- Click OK to save the changes.
If prompted for confirmation or to restart the network adapter, follow the on-screen instructions accordingly.
By following these steps, you have successfully changed the DNS server manually in Windows 10. Using custom DNS servers can help resolve DNS-related issues or allow you to use specific DNS services for your network connection.
You Can Also Check, 7 Methods To Fix Fortnite Server Not Responding – Step-By-Step Guide
If you want to revert to the default DNS server settings or use automatic DNS server assignment, you can simply select the Obtain DNS server address automatically option in the Internet Protocol Version 4 (TCP/IPv4) Properties window.
It’s important to note that changing DNS server settings may affect your network connectivity and internet access. Make sure to enter valid and reliable DNS server addresses to ensure proper functionality.
Solution 5: Disable Firewall and Antivirus Temporarily
To determine if your firewall or antivirus software is causing the DNS Server Not Responding error, disable them temporarily. Follow the instructions provided by your specific security software to disable their functions temporarily. Check if the error persists after disabling the firewall or antivirus software. If the error is resolved, you may need to adjust the settings of your security software to allow DNS requests.
Solution 6: Start Your Computer in Safe Mode
Note : Doing so will limit the files and resources used for running Windows, and can be an effective way to troubleshoot problems.
How Do I Start My Computer in Safe Mode?
- To start your Windows 10 computer in Safe Mode, first select the Windows button, and then hover over the Power icon.
- Next, while you’re holding down the Shift key, select Restart:
- In the window that appears, click on Troubleshoot > Advanced. Under Advanced options, select Start-Up Settings, followed by Restart. More options will appear. You can press 4 or 5 to Enable Safe Mode or Enable Safe Mode with Networking respectively. Your computer will then restart in Safe Mode.
If you’re using Windows 7 or earlier, you can restart it in Safe Mode by going to Power > Restart. Then, while it’s booting up, hold down the F8 key.
Solution 7: Disable Secondary Connections
If disabling your antivirus software or firewall didn’t do the trick, another potential solution is to disable any secondary connections available on your device. You want to make sure that only the connection you’re currently using is active.
How Do I Disable Secondary Connections?
If you want to disable secondary connections in Windows 10, you can follow the steps below:
- Press the Windows key on your keyboard or click on the Start button in the taskbar to open the Start menu.
- From the Start menu, click on the Settings icon (shaped like a gear) to open the Settings app.
- In the Settings app, click on the Network & Internet option.
- In the left sidebar, select the Ethernet or Wi-Fi tab, depending on the type of connection you want to disable.

- Under the selected tab, you will see the list of available network connections. Look for the secondary connection that you want to disable.
- Once you locate the secondary connection, click on it to select it.
- After selecting the secondary connection, click on the Disconnect button or toggle the switch to the Off position to disable the connection.
- If prompted for confirmation, click on Yes or OK to confirm the action.
- The secondary connection should now be disabled, and you will no longer be able to use it for network connectivity.
- Repeat these steps for any additional secondary connections that you want to disable.

It’s important to note that disabling a secondary connection will only affect that specific connection. Your primary connection, which is usually the one you use for internet access, will remain active. If you ever want to re-enable a secondary connection, you can follow the same steps but toggle the switch to the On position or click on the Connect button instead.
Disabling secondary connections can be useful if you want to prioritize or manage your network connections more efficiently, especially when dealing with multiple devices or network adapters.
Solution 8: Disabling Peer-to-Peer Feature
The Windows Peer-to-Peer (P2P) feature is designed to help distribute updates and apps more efficiently by allowing your computer to share downloaded content with other devices on your local network or the internet.
Unfortunately, it can also interrupt DNS Setting sometimes. So it’s worth to disable it and check.
How to Disable Peer-to-Peer feature in Windows
- Press the Windows key on your keyboard or click on the Start button in the taskbar to open the Start menu.
- From the Start menu, click on the Settings icon (shaped like a gear) to open the Settings app.
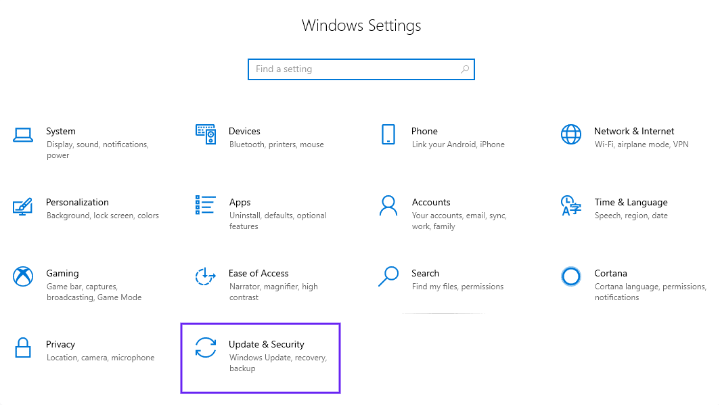
- In the Settings app, click on the Update & Security option.
- In the left sidebar, select the Windows Update tab.
- Scroll down the page until you see the Advanced options link. Click on it.
- Under the Advanced options, click on the Delivery Optimization link.
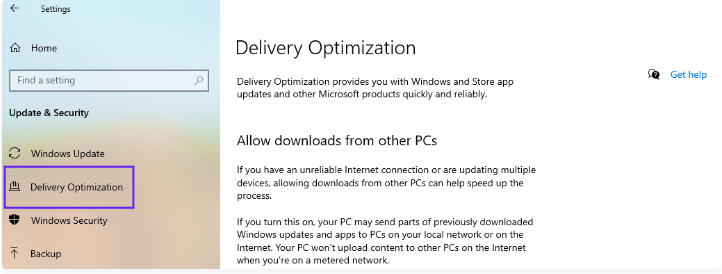
- In the Delivery Optimization settings, you will see an option that says Allow downloads from other PCs. Toggle the switch to the Off position to disable the Windows P2P feature.

- If you want to completely disable all P2P sharing, toggle the switch under PCs on my local network to the Off position as well.
- You can also choose to limit the bandwidth used for P2P downloads by clicking on the Advanced options link under Download settings and adjusting the slider according to your preference.
- Once you have made your desired changes, close the Settings app.
By following these steps, you have successfully disabled the Windows Peer-to-Peer feature on your Windows 10 computer. This will prevent your computer from sharing downloaded updates and apps with other devices.
It’s important to note that disabling P2P sharing may result in slower download speeds for updates and apps, as your computer will rely solely on Microsoft servers for these downloads. Additionally, enabling P2P sharing can help reduce the load on Microsoft’s servers and contribute to a more efficient distribution system.
If you ever wish to re-enable the P2P feature, simply follow the same steps and toggle the switches to the On position or make the desired changes in the Delivery Optimization settings.
Solution 9: Disable IPv6 in Windows
- Press the Windows key on your keyboard or click on the Start button in the taskbar to open the Start menu.
- From the Start menu, click on the Settings icon (shaped like a gear) to open the Settings app.
- In the Settings app, click on the Network & Internet option.
- In the left sidebar, select the Ethernet or Wi-Fi tab, depending on the type of network connection you want to modify.
- Under the selected tab, click on the Change adapter options link.
- You will see a list of network adapters. Right-click on the network adapter that you are currently using and select Properties.

- In the network adapter properties window, locate Internet Protocol Version 6 (TCP/IPv6) and uncheck the checkbox next to it.

- Click on OK to save the changes and close the properties window.
- If prompted for confirmation or to restart the network adapter, follow the on-screen instructions accordingly.
- Repeat steps 6-9 for any additional network adapters you want to disable IPv6 on.
By following these steps, you have successfully disabled IPv6 on your Windows 10 computer. It’s important to note that disabling IPv6 may affect certain network-related functionalities, and it’s generally recommended to leave IPv6 enabled unless you have specific reasons for disabling it.
If you ever wish to re-enable IPv6, simply follow the same steps and check the checkbox next to Internet Protocol Version 6 (TCP/IPv6) in the network adapter properties window.
It’s worth mentioning that disabling IPv6 may not completely remove it from your system, as some applications and services may still use it. However, by disabling it at the network adapter level, you can ensure that your computer does not actively utilize IPv6 for network communications.
Solution 10: Contact Your Network Service Provider
If none of the above solutions work, it’s possible that the issue lies with your network service provider. Contact your service provider’s customer support and explain the DNS Server Not Responding error you are experiencing. They will be able to guide you further and provide assistance in resolving the issue.
FAQs about DNS Server Not Responding in Windows 10
Q1: Why does my Windows 10 computer show the DNS Server Not Responding error?
The DNS Server Not Responding error can occur due to various reasons, such as outdated network adapter drivers, incorrect DNS server settings, firewall or antivirus interference, or issues with your network service provider.
Q2: How can I update my network adapter drivers?
To update your network adapter drivers, open Device Manager, expand the Network adapters category, right-click on your network adapter, and select Update driver. Follow the on-screen instructions to complete the update process.
Q3: What are DNS server settings?
DNS server settings are the addresses of the servers responsible for translating domain names into IP addresses. They allow your computer to connect to websites. Correct DNS server settings are crucial for proper internet connectivity.
Q4: Can I change my DNS server settings in Windows 10?
Yes, you can change your DNS server settings in Windows 10. Open the Network & Internet settings, click on Change adapter options, right-click on your active network connection, select Properties, and then configure the DNS server addresses under Internet Protocol Version 4 (TCP/IPv4) properties.
Is it safe to temporarily disable my firewall and antivirus software?
A5: Temporarily disabling your firewall and antivirus software is generally safe, as long as you have taken necessary precautions and trust the websites you visit. However, remember to enable them after troubleshooting the DNS Server Not Responding error.
What should I do if none of the solutions work?
A6: If none of the provided solutions resolve the DNS Server Not Responding error, contact your network service provider’s customer support for further assistance. They will be able to investigate and address any issues on their end.
Conclusion
Encountering the DNS Server Not Responding error in Windows 10 can be frustrating, but with the right solutions, you can resolve this issue and regain access to the internet. By following the troubleshooting steps outlined in this article, you can address common causes such as outdated network adapter drivers, incorrect DNS server settings, firewall or antivirus interference, or network service provider issues. Remember to try each solution methodically and test your internet connection after implementing each fix.